


Snapmaker Laser Cutting Guide: A Comprehensive Walkthrough
The Snapmaker is a versatile 3-in-1 machine that combines 3D printing, laser cutting, and CNC carving capabilities. In this comprehensive guide, we will focus on the laser cutting aspect of the Snapmaker, providing a detailed walkthrough of the process, from setup to post-processing.
H1: Setting Up Your Snapmaker for Laser Cutting


Table of Content
- 1 Snapmaker Laser Cutting Guide: A Comprehensive Walkthrough
- 1.1 H1: Setting Up Your Snapmaker for Laser Cutting
- 1.2 H1: Setting Up Your Snapmaker for Laser Cutting
- 1.3 H2: Preparing Your Design for Laser Cutting
- 1.4 H3: Cutting with the Snapmaker Laser
- 1.5 H4: Post-Processing Laser Cuts
- 1.6 H5: Troubleshooting Laser Cutting Issues
- 1.7 Conclusion
- 1.8 FAQs
Materials Required:
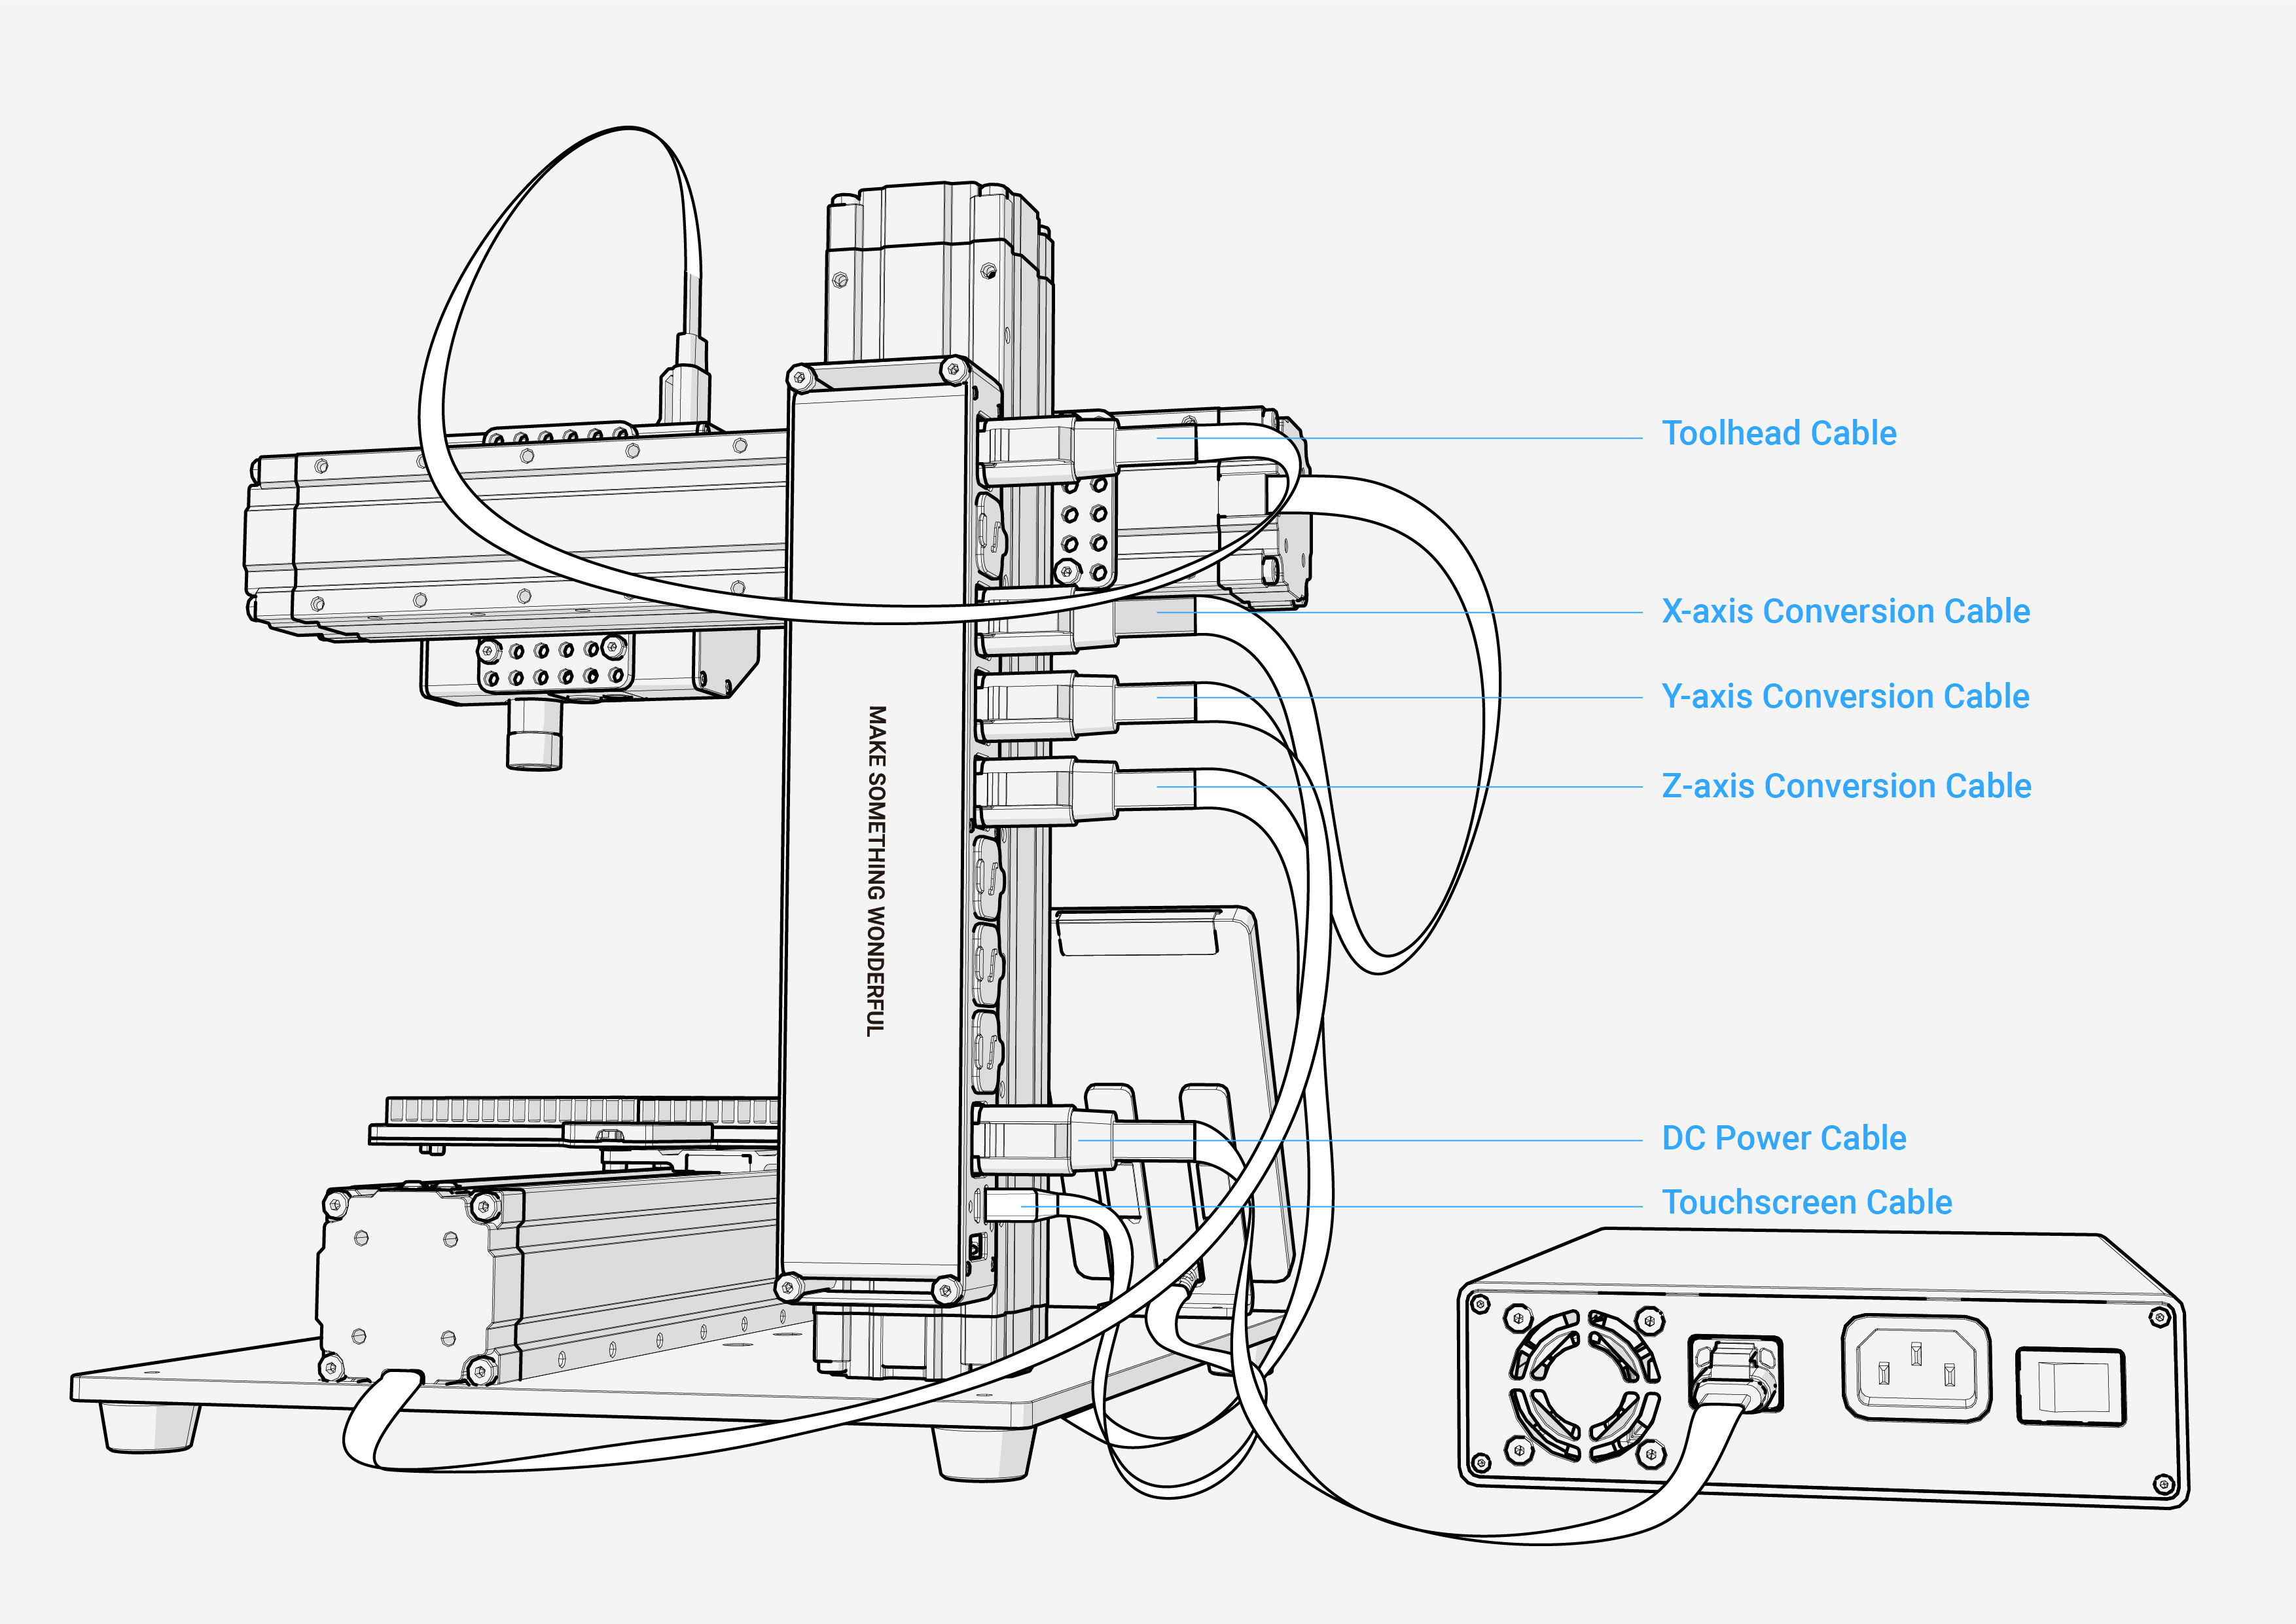
Step 1: Install the Laser Module

- Remove the 3D printing head and insert the laser module into its slot.
- Tighten the screws to secure the module.

H1: Setting Up Your Snapmaker for Laser Cutting
- 3d Tube Cutting 3D Tube Cutting: A Comprehensive Guide To Advanced Manufacturing
- 3d Laser Cut 3D Laser Cutting: A Comprehensive Guide To Precision Fabrication
- Sculpteo Laser Cutting Sculpteo Laser Cutting: A Comprehensive Guide To Precision Manufacturing
- Laser Cutter Comparable To Glowforge Laser Cutter Comparable To Glowforge: A Comprehensive Guide
- 3d Laser Cutting Metal 3D Laser Cutting Metal: A Comprehensive Guide
Materials Required:
- Snapmaker 2.0 or Snapmaker Original
- Laser module
- Laser safety glasses
- Locate the laser safety switch and connect it to the laser module.
- This switch ensures that the laser only operates when the safety enclosure is closed.
- Assemble the safety enclosure around the laser cutting area.
- Make sure the enclosure is securely fastened to prevent laser exposure.
- Use the focus adjustment knob on the laser module to set the laser focus.
- The ideal focus point varies depending on the material being cut.
- Snapmaker Luban Software
- Import your design into Snapmaker Luban Software.
- Supported file formats include SVG, PNG, JPG, DXF, and AI.
- Select the "Laser" tab in Luban.
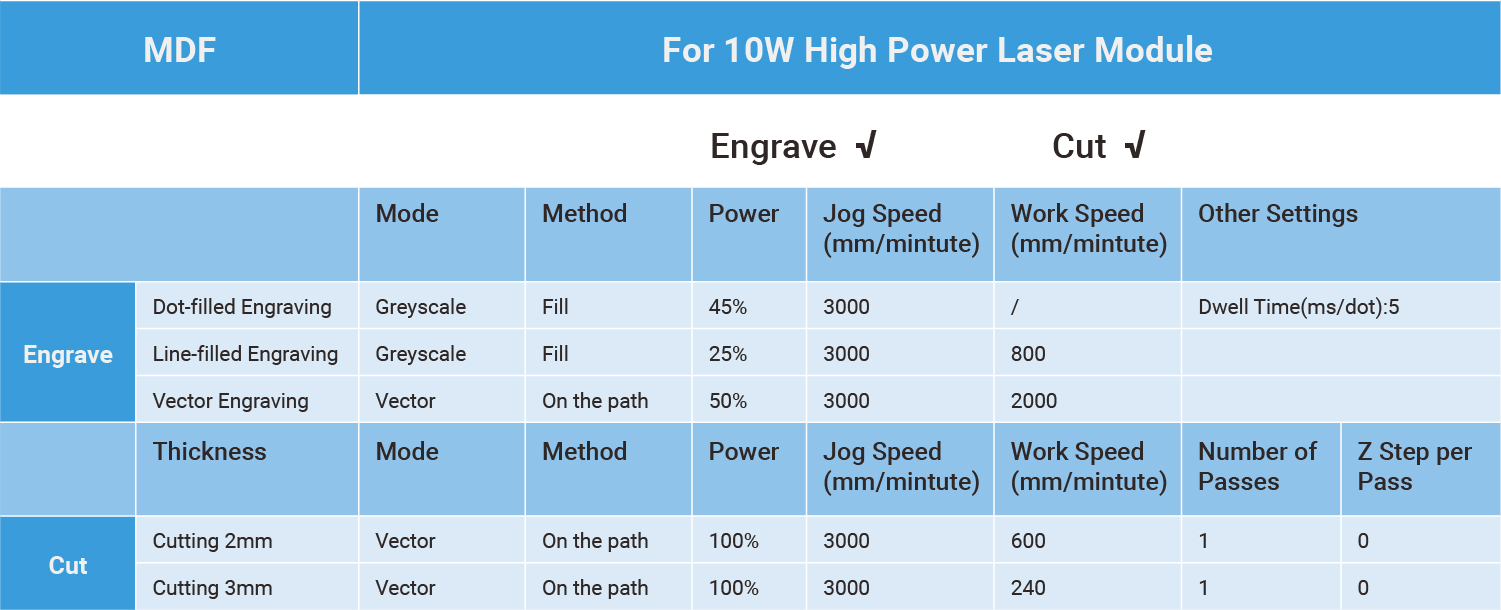
- Adjust the cutting speed, power, and passes based on the material and thickness.
- Preview the laser path and make any necessary adjustments to the design or parameters.
- Use the "Laser Simulation" feature to visualize the cutting process.
- Always wear laser safety glasses when operating the laser cutter.
- Place the material to be cut on the cutting bed.
- Secure the material using clamps or double-sided tape.
- Close the safety enclosure and press the "Start" button in Luban.
- The laser will begin cutting the material according to the specified parameters.
- Keep an eye on the cutting process through the safety enclosure window.
- If any issues arise, pause or stop the cutting immediately.
- Once the cutting is complete, remove the excess material from the workpiece.
- Use pliers, tweezers, or a vacuum cleaner for this purpose.
- Use sandpaper or a file to smooth the cut edges and remove any burrs.
- This step improves the appearance and safety of the workpiece.
- Depending on the material, additional finishing techniques may be required.
- This could include painting, staining, or applying a clear coat.
- Laser Not Firing: Check the laser safety switch, focus adjustment, and electrical connections.
- Uneven Cuts: Adjust the laser focus, cutting speed, or passes.
- Material Melting: Reduce the laser power or increase the cutting speed.
- Material Burning: Use a compressed air assist to cool the cutting area.
- Laser Beam Misalignment: Recalibrate the laser module.
- A: The Snapmaker Laser can cut a variety of materials, including wood, acrylic, leather, cardboard, and fabric.
- A: The cutting thickness depends on the material and laser power. For wood, the maximum thickness is around 5mm.
- A: Yes, the Snapmaker Laser is equipped with safety features such as a safety enclosure, laser safety switch, and laser protection glasses.
- A: Use a soft cloth and rubbing alcohol to clean the laser lens and nozzle. Do not use abrasive cleaners.
- A: The Snapmaker Laser comes with a 12-month warranty.
Step 2: Connect the Laser Safety Switch


Step 3: Install the Safety Enclosure
Step 4: Adjust the Laser Focus
H2: Preparing Your Design for Laser Cutting
Software:
Step 1: Import Your Design
Step 2: Set Laser Cutting Parameters
Step 3: Preview and Adjust
H3: Cutting with the Snapmaker Laser
Step 1: Wear Safety Gear
Step 2: Position the Material
Step 3: Start Cutting
Step 4: Monitor the Process
H4: Post-Processing Laser Cuts
Step 1: Remove Excess Material
Step 2: Clean the Cut Edges
Step 3: Finish the Surface
H5: Troubleshooting Laser Cutting Issues
Conclusion
Laser cutting with the Snapmaker is a versatile and precise process that opens up a wide range of possibilities for makers and hobbyists. By following the steps outlined in this guide, you can effectively set up, prepare, cut, and post-process your laser cut projects. Remember to always prioritize safety and follow the manufacturer’s instructions to ensure a successful and enjoyable laser cutting experience.
FAQs
Q: What materials can I cut with the Snapmaker Laser?
Q: How thick can the Snapmaker Laser cut?
Q: Is the Snapmaker Laser safe to use?
Q: How do I clean the Snapmaker Laser?
Q: What is the warranty on the Snapmaker Laser?


